This guide will provide instructions on applying multi-factor authentication (MFA) to your company Microsoft account using the Microsoft Authenticator mobile app on your Android device (e.g. smartphone or tablet). MFA ensures your account stays secure by prompting you to approve new sign-ins, making it more difficult for other people to sign into your account.
Note: In this article, I will refer to a mobile device as “device”, but this will likely be your smartphone. This authentication method will be of much more use to you by using a device you will have with you most often.
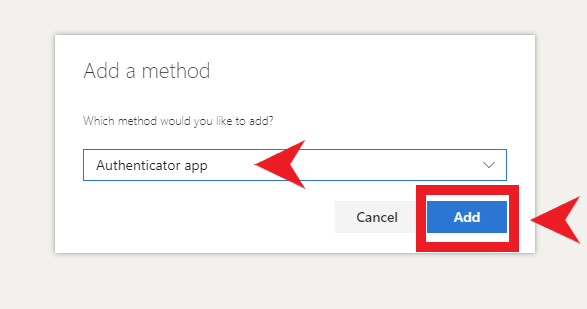
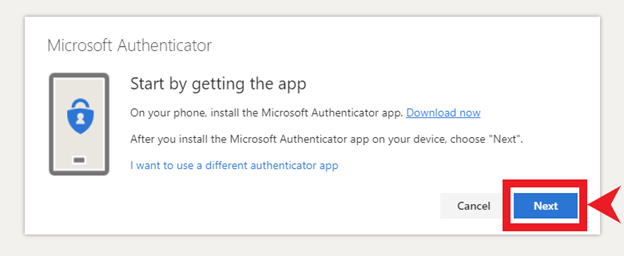
2. Ensure “Authenticator app” is shown in the drop-down field. If it isn’t, click the down arrow towards the right and select “Authenticator app” from the choices given. Click “Next”.
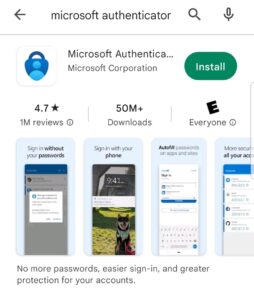
3. Open your Android device and open the Google Play Store. The icon is a multi-colored triangle with a white background, as shown in the image below:
4. Search for “microsoft authenticator” in the Google Play Store (search bar is at the top of the screen when you open the Google Play Store app). In the suggestions below the search bar, tap on the suggestion that says “Microsoft Authenticator” (the icon has a blue lock on top of a white background, as shown in the image below). If this suggestion does not show, you can search for it manually on the store and it should be the first app on the page.
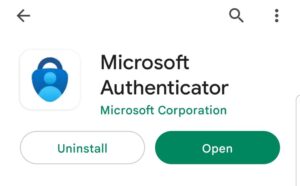
5. Tap on the “Install” button.
6. Tap “Open” after the download of the app is complete.
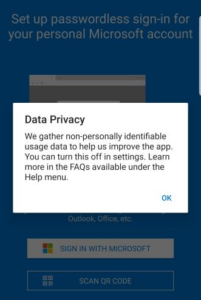
7. Tap on “OK” on this pop-up.
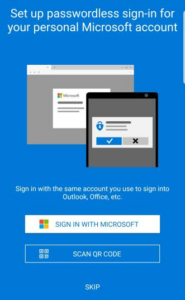
8. Tap “Skip”.
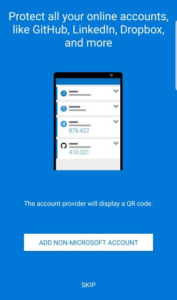
9. Tap “Skip” once more.
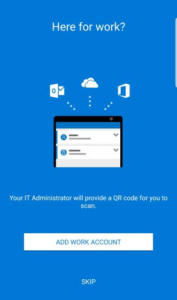
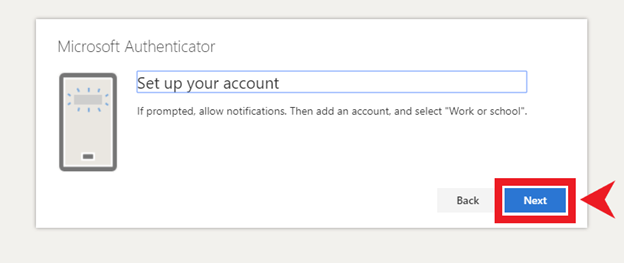
10. Tap on “Add Work Account”.
Note: Some of the following instructions will not include visual aids because the app disallows screenshots during the following process.
11. The app will open your device’s QR code scanner. You will need this for the next step. Go back to your computer and click “Next”.
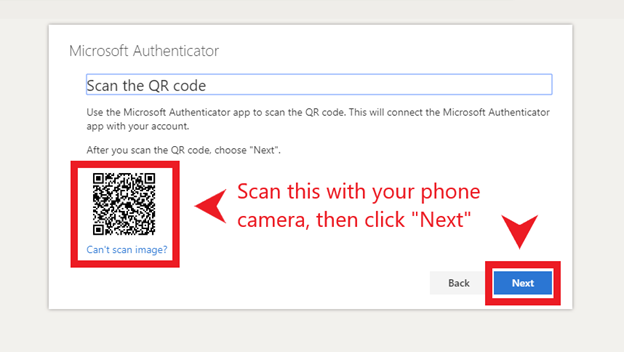
12. Click “Next” again.
13. Using the QR scanner on your device, scan the QR code shown and click “Next”.
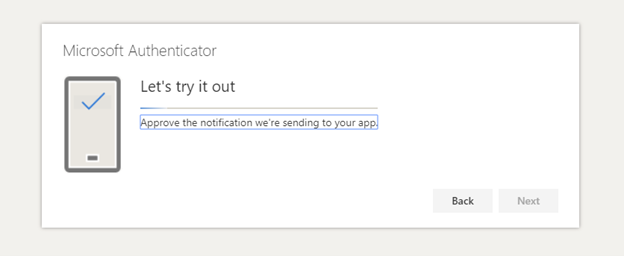
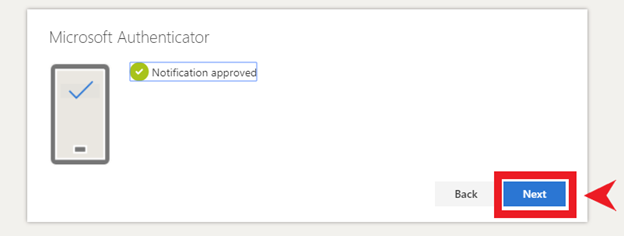
14. There should now be a notification sent to your device. Open it, and tap on “Approve”. This will be the actual process of authenticating sign-ins from now on.
15. When this next screen is shown on your computer after tapping “Approve” on your device, click “Next” on your computer.
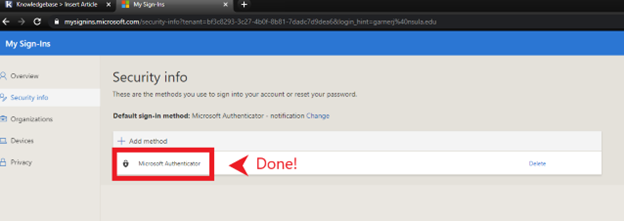
16. Make sure “Microsoft Authenticator” is show as a sign-in method. The process is now complete!
Please make sure you set up other alternate MFA methods. With only the Microsoft Authenticator method in place, you must have access to the device you installed it on and remain logged into the app to sign in. It is very important to have these authentication methods in place, but the only way to reasonably prevent most issues with MFA is to also have a phone number and email address set up as well. Feel free to view our other support articles to set up these other methods quickly and easily.